PizzaQue: The Ultimate Tool to Bring Pizza to Your Tailgate!
Welcome to my Pizzacraft Pizzaque Review based on my actual experience using the pizza oven. One of my ultimate life-long bucket list items is to build an outdoor pizza oven in my backyard, and one of my all-time favorite activities is tailgating at events like sporting events and concerts. Take these two concepts and combine it with my unhealthy obsession with pizza, and there has to be some type of product that can blend these loves and life goals together! Enter the Pizzacraft PizzaQue Portable Pizza Oven which I stumbled upon after shopping for other Pizzacraft products which I frequently use in my home pizzeria (kitchen). The concept really intrigued me because I could make a pizza in my back yard without heating up the oven and the whole house. I could take it to football games, concerts, and pretty much everywhere I wanted to make pizza!
Unboxing and Assembly
Accessories
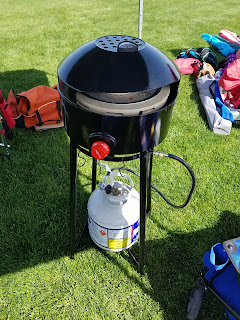
 The unit comes standard as a tabletop oven with small feet on it, but I went the extra step and purchased the leg kit so that it was freestanding on its own. The legs were also quite simple to put together one-handed. I’m so glad I went with the legs because they are very sturdy, they provide a neat place to store the propane tank, and they have handy little hooks to store your pizza peel and brush which I also picked up from pizzacraft. Just a word of advice, I do recommend the pizzacraft peel because it fits and works perfectly in this oven. The oven’s opening is pretty small, about 13″ or so, and the 12″ peel fits in perfectly. The fact that it is a thin metal also helps with the vertical clearance as well. I have 2 small peels at home, and both were too large to use with the oven.
Components
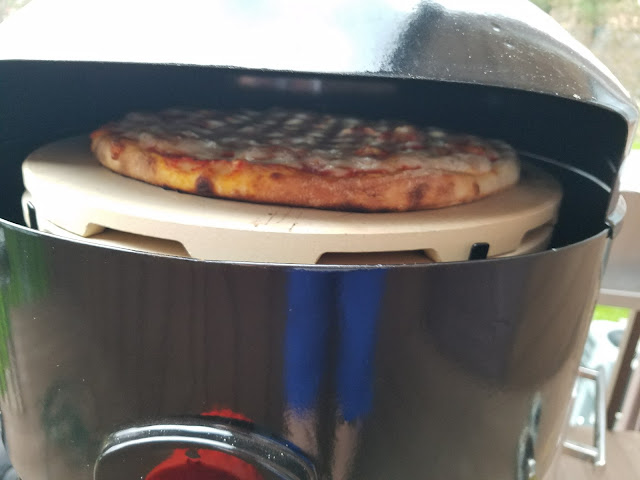
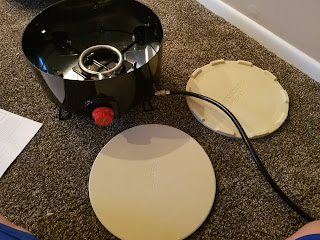
The unit comes with a two piece pizza stone system that has a gap between the two to distribute heat evenly and prevent burning as much as possible. The stone is of a medium density and seems somewhat durable, but I would be afraid to drop them from any distance. The top of the oven includes a handy thermometer that provides an easy to read temperature readout at all times and even provides “preheat” and “cooking” temperature zones for quick reference. The gas dial also allows for fairly accurate temperature regulation. Overall, this is a slick looking little oven that is really well made.
![]() Cooking Pizzas
Cooking Pizzas
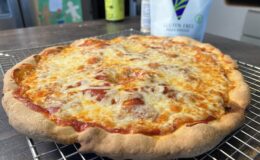
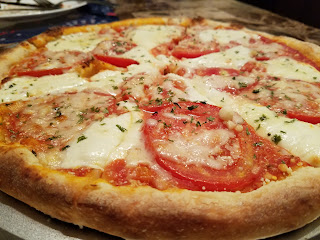
 Final setup was a breeze. I connected the included hose to the fuel tank, turned on the gas, pushed in the dial and turned it clockwise and it ignited on the first try. The instructions recommend a thorough preheat of at least 15 minutes, but no more than 20 minutes. I got distracted on my first preheat and ended up preheating on high for about 25 minutes. I was making fresh dough pizzas, and I quickly noticed that I shouldn’t have preheated that long because the bottom cooked faster than the top and would have burned had I not slid a screen underneath it. Speaking of screens, I would say that a screen is almost a must-have with this oven because it makes the process so much simpler if you don’t have the temperatures perfect. The instructions say that it takes a few pizzas to get your technique perfected, and I have to say that was the case. There are many variables such as the type of pizza you are making (fresh, frozen, parbaked, premade crust, etc), the thickness and toppings on the pizza, and the biggest variable I noticed was the wind. Since there is an opening to insert and remove the pizzas, strong gusts of wind can drop the temperature by as much as 50 degrees in just a few seconds. I recommend finding an area that isn’t super windy such as a garage or near a wall to shield the gusts on a windy day. If it’s not windy, there is really no issue.
 The cooking times were very fast once I got through the very short learning curve. It took about 6-7 minutes for a 12″ fresh dough New York Style Pizza and about 4 minutes for an 8″ personal pan pizza with a premade crust (3 personal pizzas at a time). With the wind, I do keep a close eye on the temperature to keep it in the 600-700 degree range. I probably had to adjust the flame once every 15 to 20 minutes after using it to cook pizzas over a 5 hour period (I was serving may people at an outdoor charity event!). I was amazed at how efficient that the oven was because after running the oven for 5 continuous hours, the propane tank felt as it it was still at least half full. I was also amazed at how well the oven recovered. I was able to make 12 – 8″ personal pizzas in under 15 minutes, which was pretty impressive.
The Bottom Line
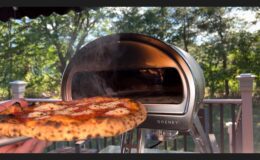
Check out my Review of the Gozney Roccbox Pizza Oven!